What You'll Set Up
During business setup, you'll configure:
Your business name and contact information
Your business location and service area
Your operational hours
Your tax settings
Your custom domain (web address)
Don't worry—you can change any of these details later if needed. Let's get started!
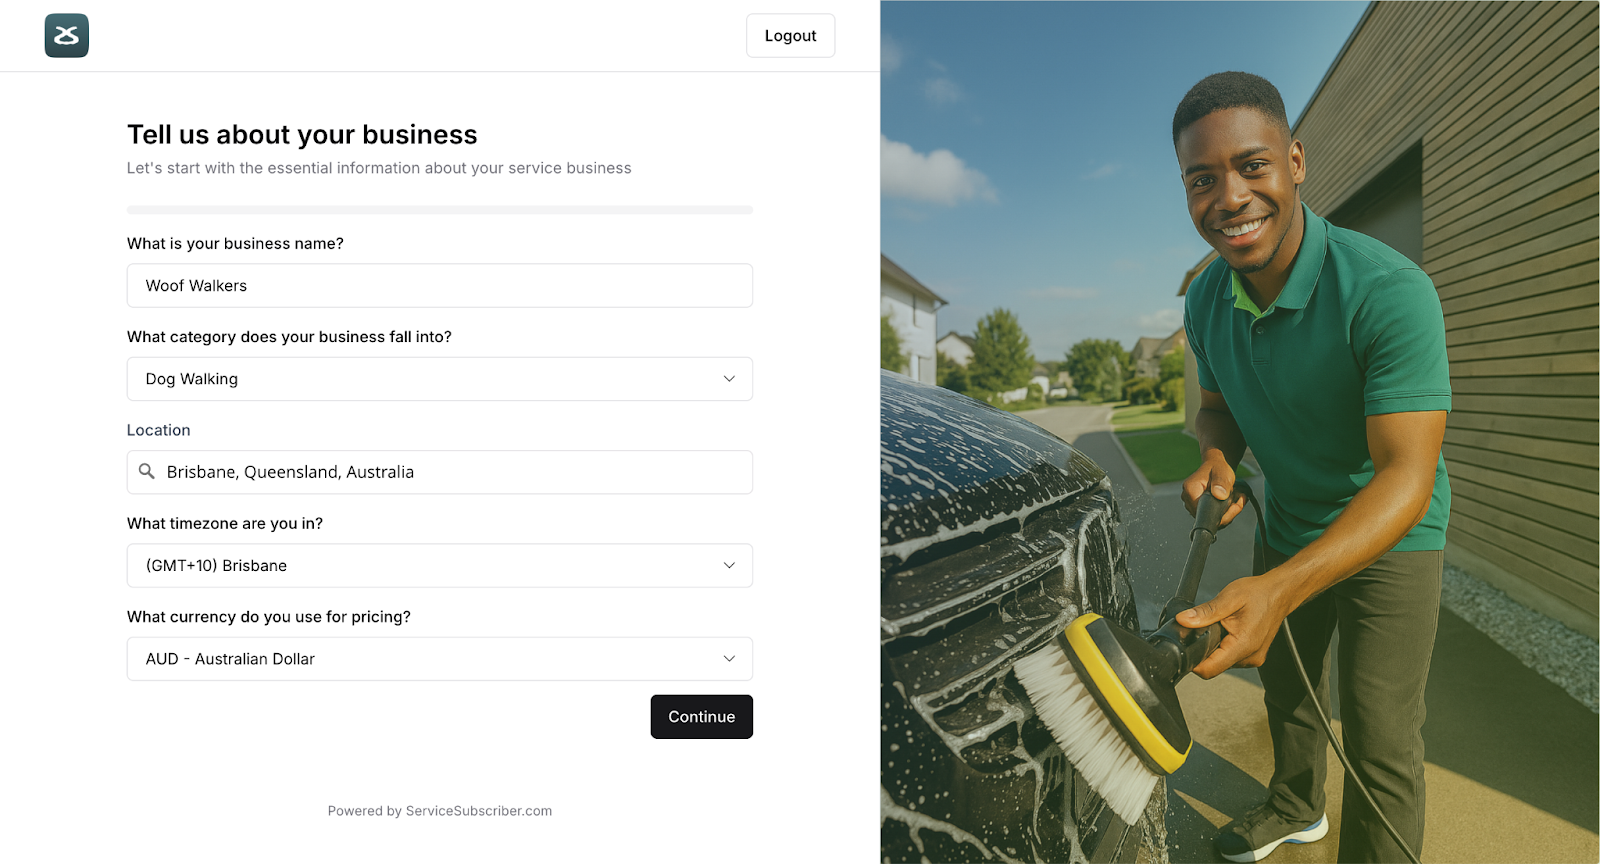
Step 1: Enter Your Business Name
Your business name is how customers will recognize you across the platform.
In the Business Name field, enter your business name
This can be your legal business name or a trading name
Keep it clear and professional—this appears on all customer communications
✍️ TIP: Use the name your customers already know you by. If you're just starting out, choose something that clearly describes what you do (e.g., "ClearView Window Cleaning" or "GreenCare Lawn Services").
Step 2: Set Your Business Location
Your location helps customers understand where you're based and which areas you serve.
Click in the Location field
Start typing your city, town, or area
Select your location from the autocomplete suggestions
Alternatively, enter your address manually

✅ BEST PRACTICE: Use your actual business address. This builds trust with customers and helps with local search visibility. If you work from home and prefer privacy, you can use your suburb/city and state instead of a full street address.
Step 3: Select Your Currency
Choose the currency you'll use for pricing and payments.
Click the Currency dropdown
Select your currency from the list
Common options include USD, AUD, CAD, GBP, EUR
⚠️ IMPORTANT: Your currency determines how prices display to customers and how you receive payments through Stripe. Choose carefully—this is harder to change later if you already have active subscriptions.
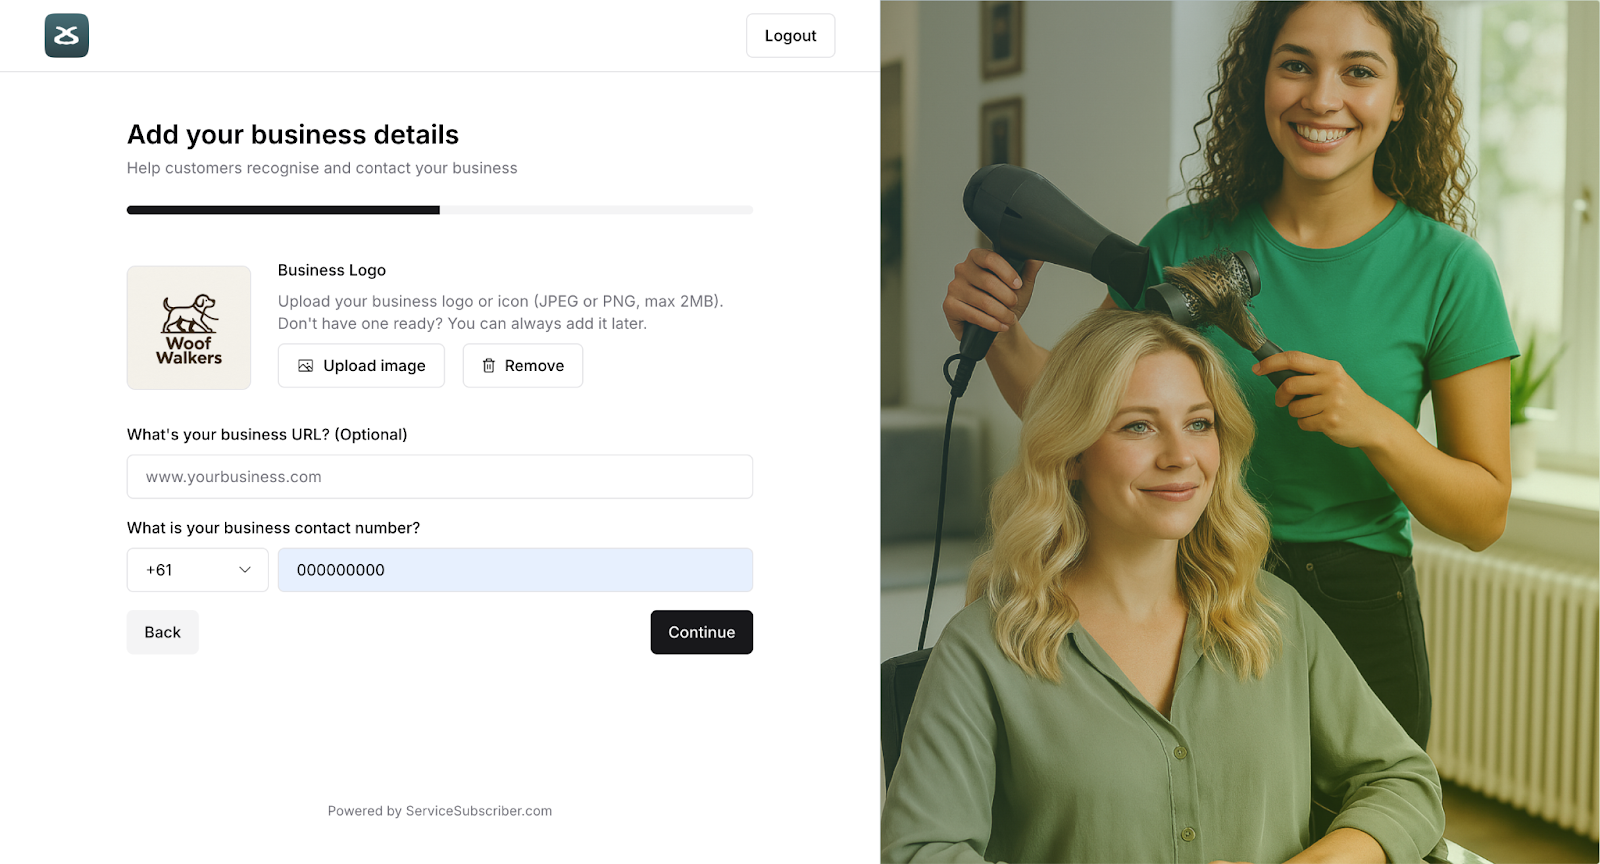
Step 4: Add Your Website
If you have an existing website, you can add it here.
In the Website field, enter your website URL
Include the full URL (e.g., https://www.yourwebsite.com)
This field is optional—skip it if you don't have a website yet
✍️ TIP: Your Service Subscriber page can serve as your main website, so don't worry if you don't have one yet. You can always add this later.
Step 5: Add Your Business Phone Number
Your phone number helps customers reach you and adds credibility to your business.
Enter your Business Phone number in the field provided
Include your area/country code if applicable
Use a number you can reliably answer or have voicemail set up
⚠️ IMPORTANT: This number will appear on your public site if you choose to display it. Make sure it's a number you're comfortable sharing with customers.
Step 6: Set Your Operational Hours
Let customers know when you're available for bookings and inquiries.
For each day of the week, set your opening and closing times
To mark a day as closed, toggle the switch or select "Closed"
Use the Copy to Multiple Days option to duplicate hours across multiple days
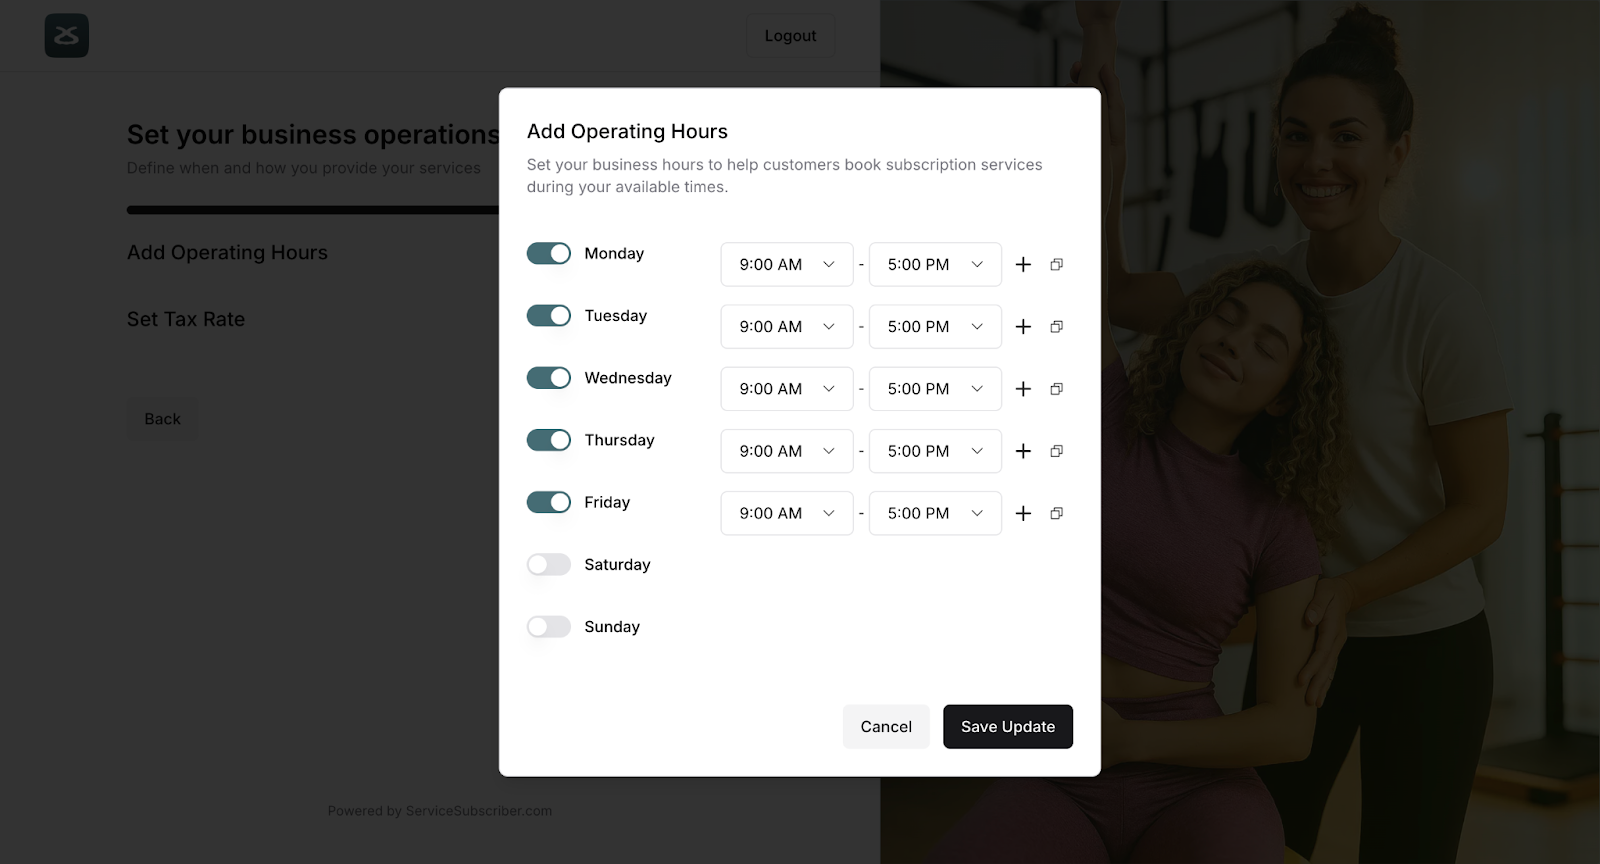
✍️ TIP: Set realistic hours that reflect when customers can expect to hear from you. These hours appear on your public site, so they help set customer expectations.
❓ COMMON QUESTION: What if my hours vary by season?
You can update your operational hours anytime from your business settings. Many service businesses adjust their hours seasonally—just remember to update them when your schedule changes.
Step 7: Configure Your Tax Settings
Set up how taxes apply to your services.
Option 1: Single Tax Rate (Most Common)
Select Single Tax Rate if you charge one tax rate for all services
Enter your tax percentage (e.g., 10 for 10% GST/VAT)
Choose Tax Inclusive or Tax Exclusive
Tax Inclusive: The price shown includes tax (recommended for most businesses)
Tax Exclusive: Tax is added on top of the displayed price
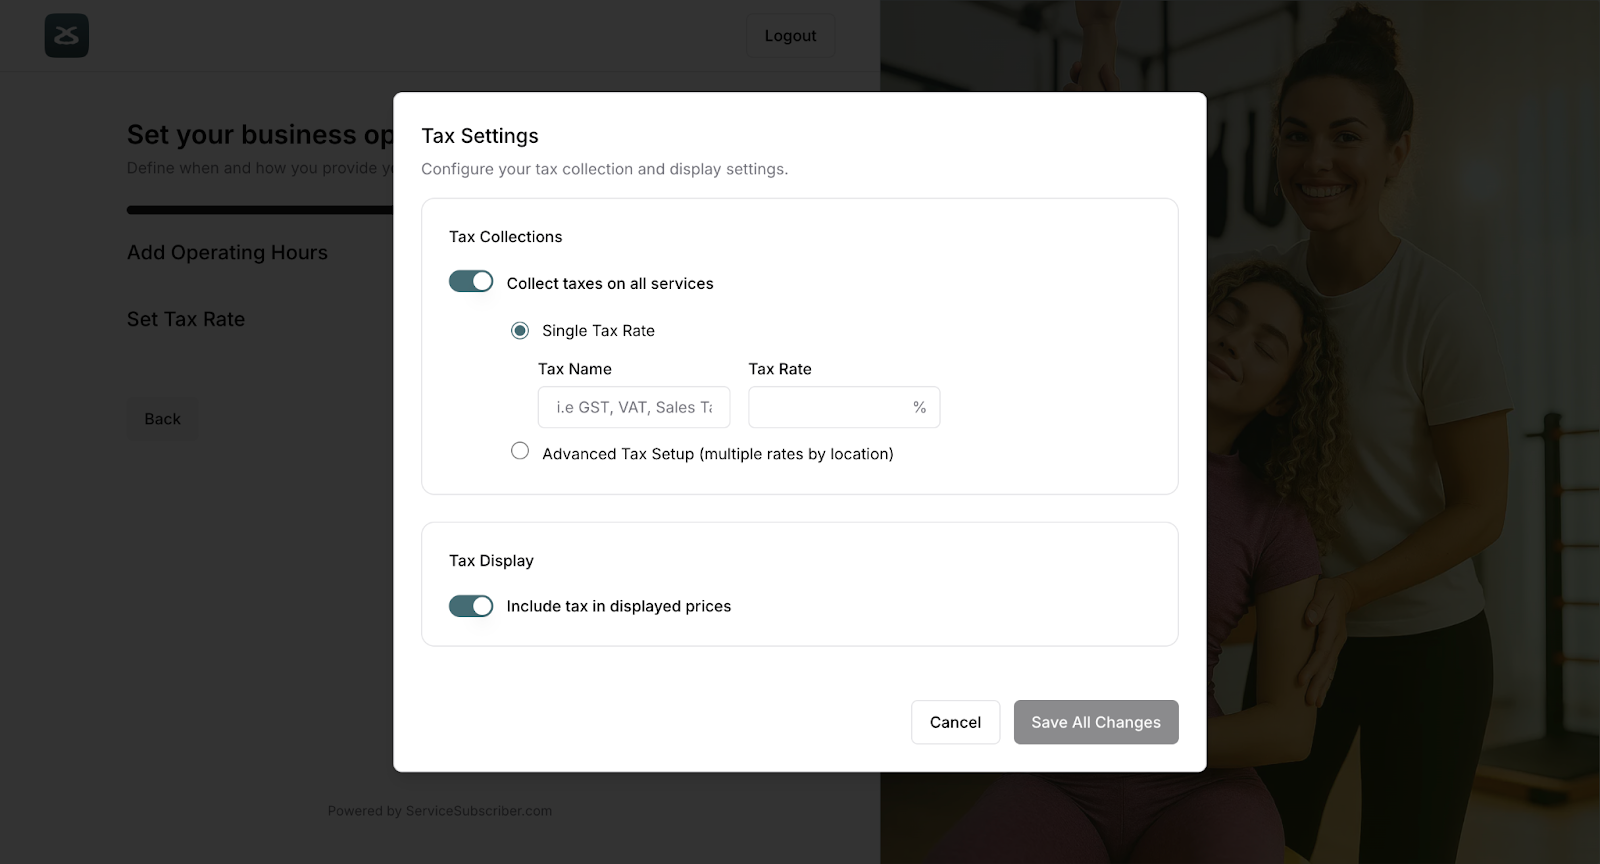
Option 2: Automatic Tax by Location
Select Multiple Tax Rates if you need different rates for different locations or service types
This is common in the USA where sales tax varies by state
You'll configure specific rates for each service later
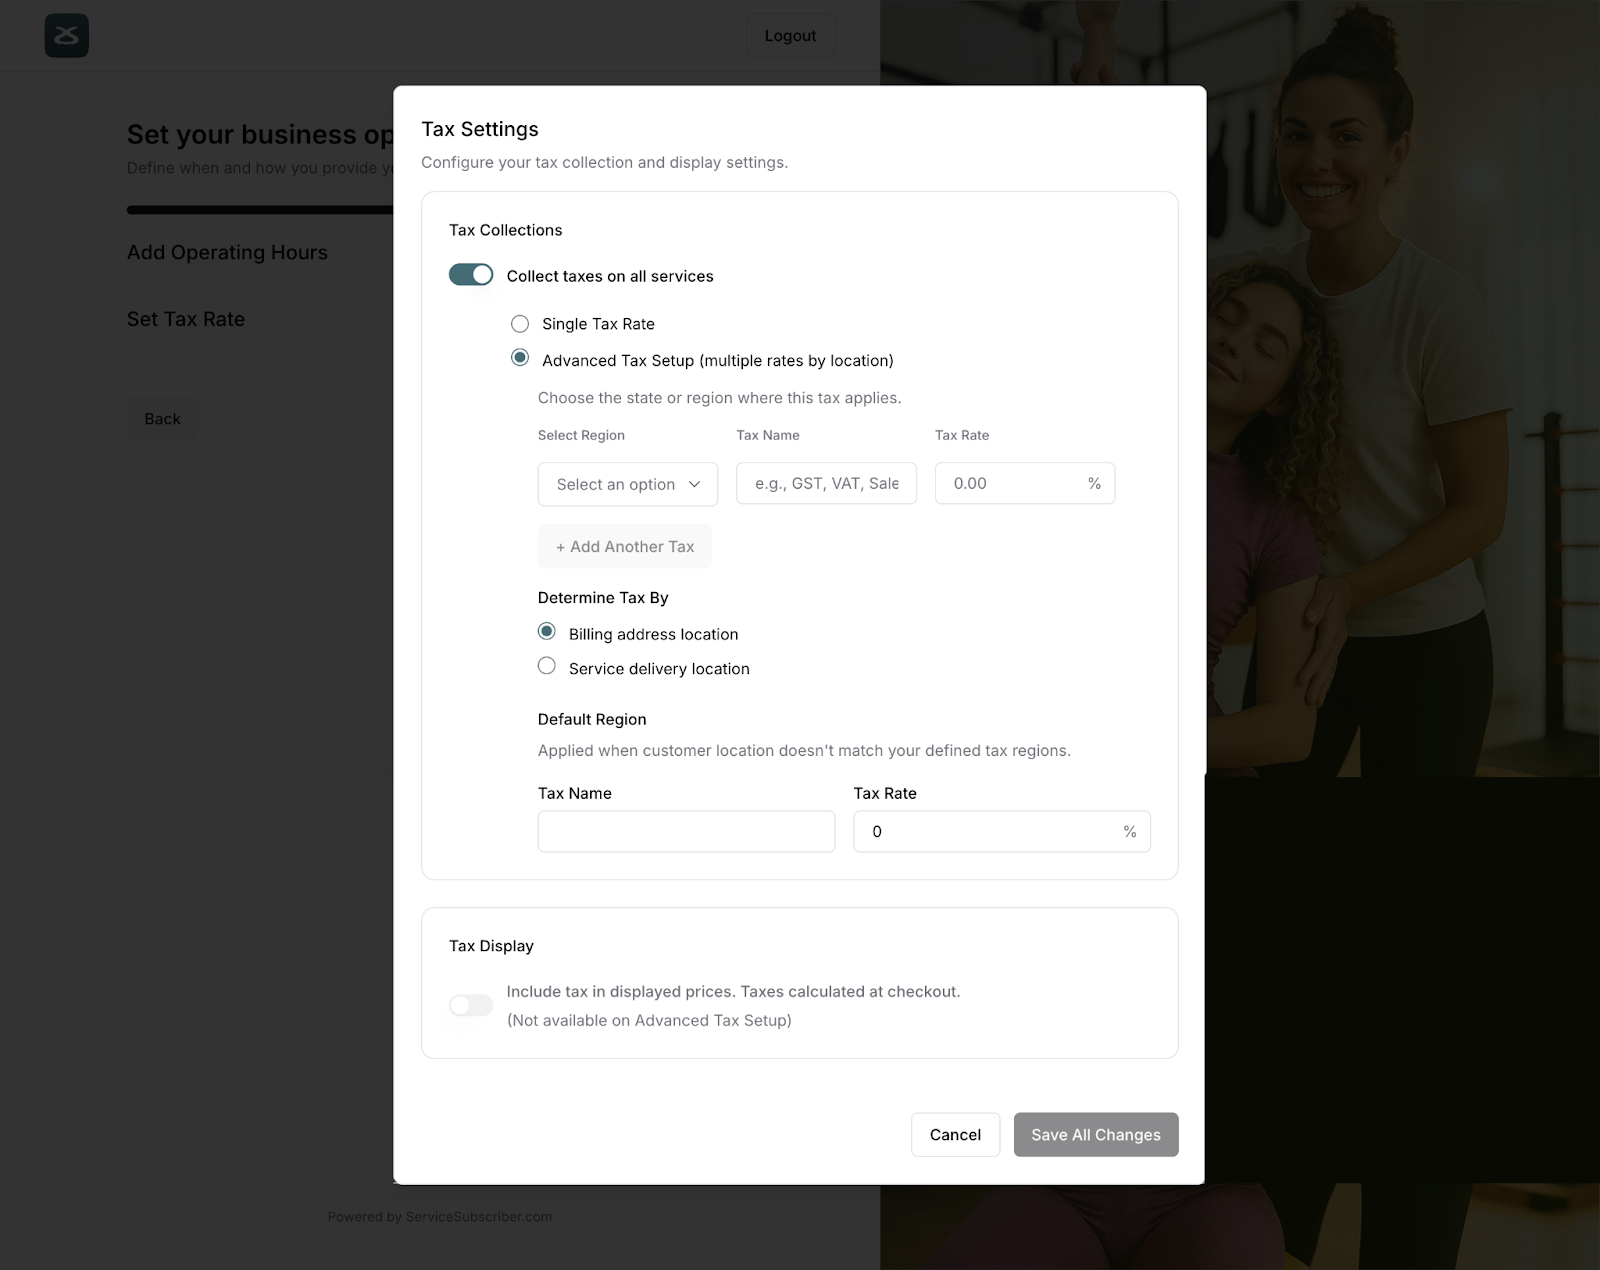
⚠️ IMPORTANT: If you're not registered for tax (GST, VAT, sales tax, etc.), you can skip this step for now. You can always add tax settings later when you're registered.
Step 8: Choose Your Domain
Your domain is your unique web address where customers find your subscription services.
In the Domain field, enter your desired subdomain name
Your full URL will be: businessname.servicesubscriber.com
The system will check if your chosen name is available
If taken, try variations like adding your location or service type
Custom domain input field showing availability status
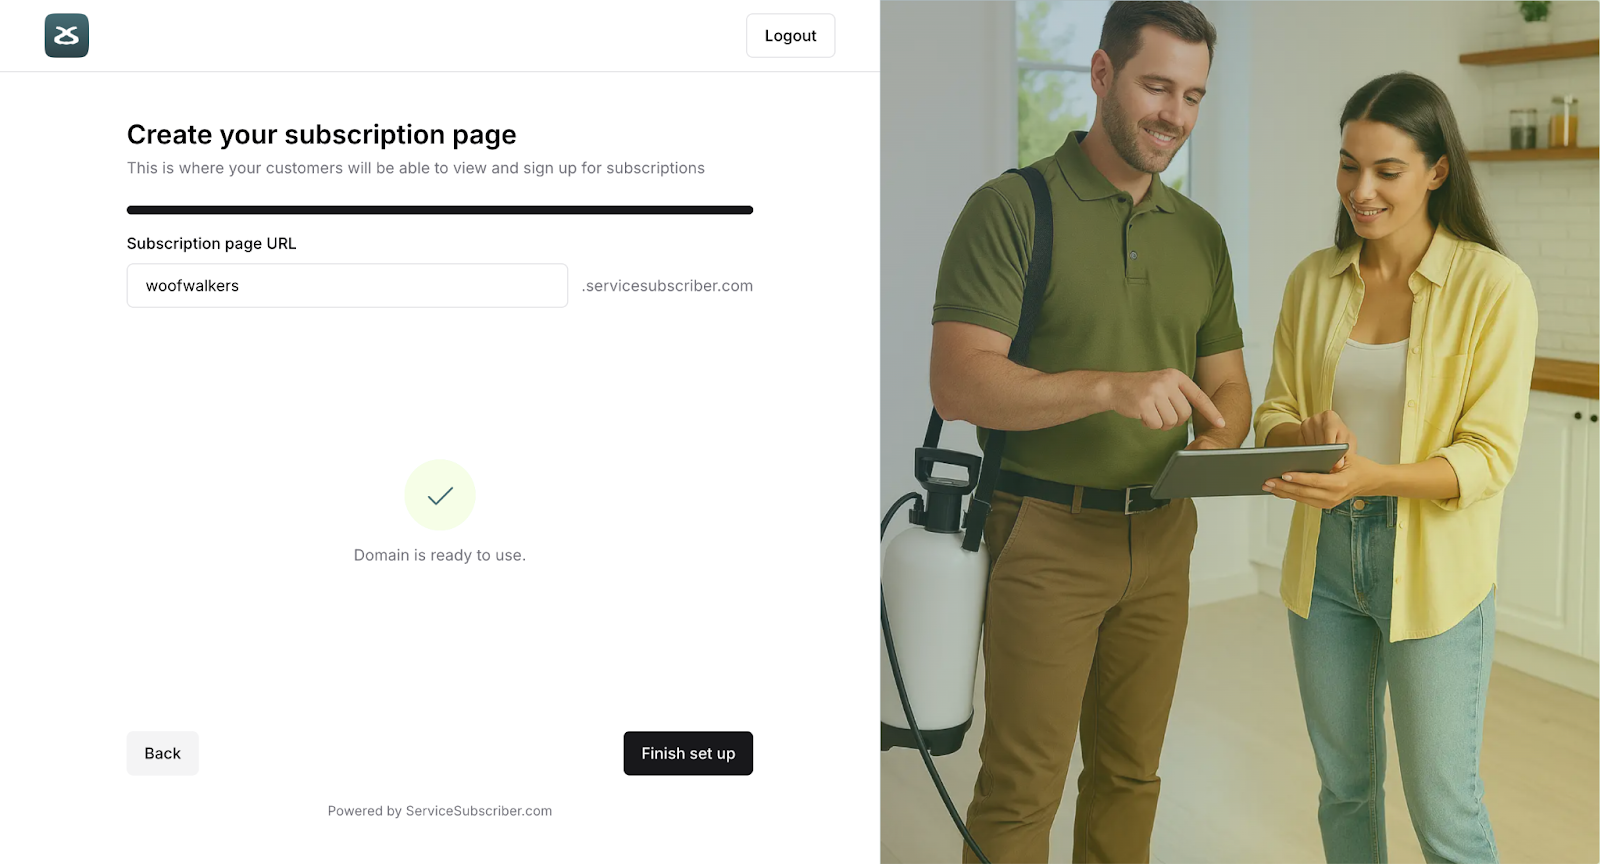
✍️ TIP: Keep it short, memorable, and related to your business name. Examples:
cleanviewwindows.servicesubscriber.com
greencarelawns.servicesubscriber.com
sparkledetailing.servicesubscriber.com
What Happens Next
Once you've completed all the business details fields, click Continue or Next Step.
You'll be redirected to the Guided Setup page, which is your home base for completing the remaining setup tasks.
✨ Great work! You've laid the foundation for your service business. These details help you look professional and make it easy for customers to find and trust you.
Was this article helpful?
That’s Great!
Thank you for your feedback
Sorry! We couldn't be helpful
Thank you for your feedback
Feedback sent
We appreciate your effort and will try to fix the article